‘ADM Power’: Power Tools for Citrix ADM

Hi everyone, I know it’s been a while but I figured this post would be one of those ‘better late than never’ types where readers can hopefully forgive me in exchange for a shiny new utility that I created and felt was useful enough to share!

Without further ado I give you ‘ADM Power‘, a forms-based PowerShell script that automates and simplifies a lot of Citrix ADM & ADC tasks in an enterprise environment (i.e. more than a few ADCs).

What is ADM Power?

As the name implies this PowerShell script uses Citrix’s Nitro APIs to interact with a target ADM, as well as the ADCs it manages, and includes several ‘power tools’ that I’ve started trying to describe in the readme.
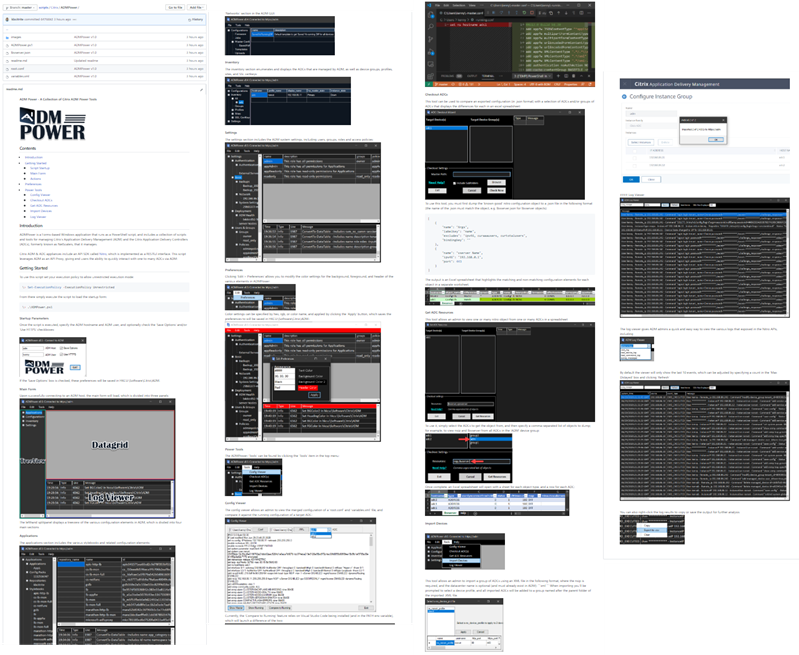
The script builds upon and includes modified versions of the functions that I shared in this PowerShell module for Citrix ADM last year, is designed to be self contained, and only requires the ADMPower.ps1 file and ability to run it.. and of course access to a functional ADM 🙂

How do you use it?

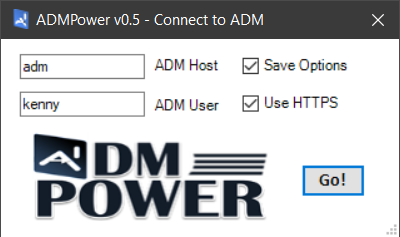
Because the script uses Windows form objects to interact with the user, it’s more like a utility than a script. For example, instead of using startup parameters when you launch the script, it prompts you for the relevant details to connect to your ADM instance:
Once connected, you can do lots of ‘stuff & things’ that I’ve added along the way, and can even add your own by reverse engineering my probably not-so-organized script :S

What can it do?

I’ve added a lot of stuff that I find useful, and so there are a lot of things in the readme that I won’t mention here.

That said, I haven’t documented everything that it can do because I tried to make usage as intuitive as possible by leveraging standard GUI elements like labels, toolstrips, and context menus.

For example, you can right-click ADCs to perform common tasks against them, such as logging on in the browser (using the ADM device profile), or opening an SSH or SCP session using prompted credentials:
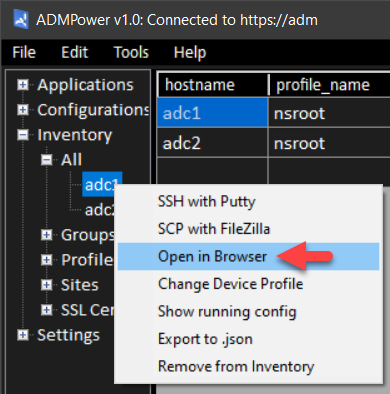
Right-click nodes for actions
Search for actions to modify or add your own

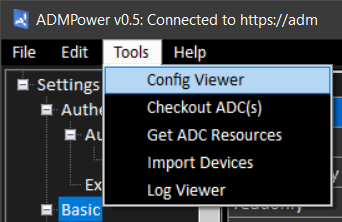
As you can see there are a few other right-click options on ADCs, and there are others elsewhere, particularly in the ‘Inventory’ and ‘Configurations’ sections, as well as a collection of Tools in the menu bar:
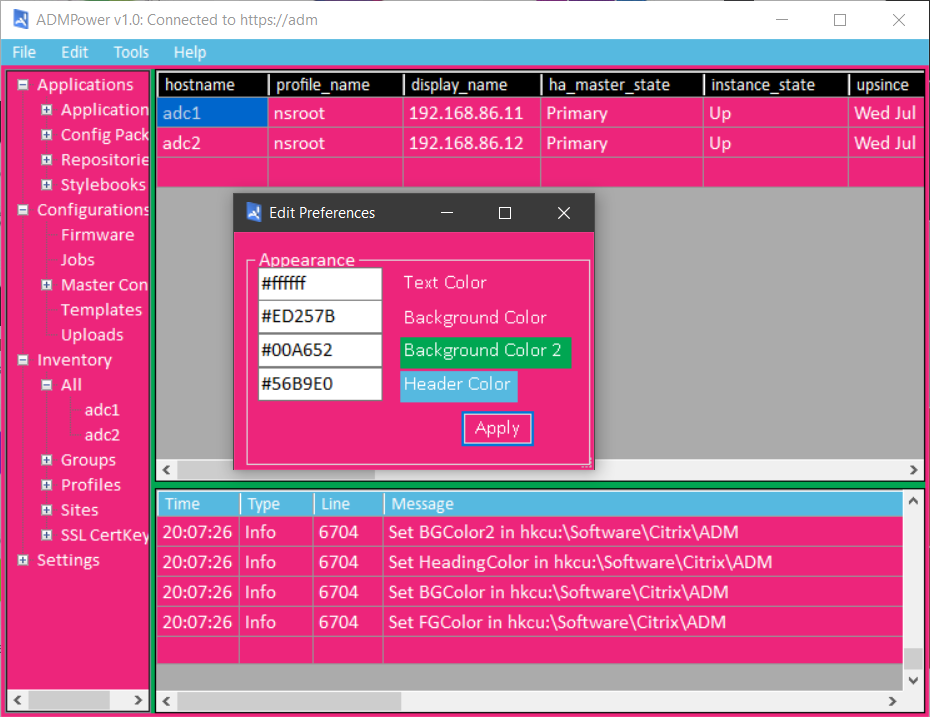
I even added an ‘Edit>Preferences’ form so that you can make ADM Power look the way you like!
Why is Kenny sharing this?

The reason I wrote this in PowerShell was to give anyone who can run it the opportunity to use it while also giving those who can edit and/or write scripts (or use tools like poshgui) the ability to use or extend whatever parts they find useful.

In return I’d ask that if you use this script you give credit where it’s due, and otherwise help me to make the tool more Powerful by providing useful feedback and/or bug fixes! 🙂

In Conclusion..

I’m still working on documenting everything, but I felt like the readme has enough to get most started. I’d like to emphasize that you should use caution when running any script from the internet, and would checking with your organization’s internal policies before you start using it in a production environment.

In general I would suggest starting with a read-only account if you want to step through it first and get acquainted, but would otherwise say that it reads more than it writes and is mostly safe from accidental screw-ups.. but please be careful regardless.

I plan to keep the utility updated as I add features and/or fix bugs, so please feel free to ask questions and share any feedback you might have.

Thanks! -KB
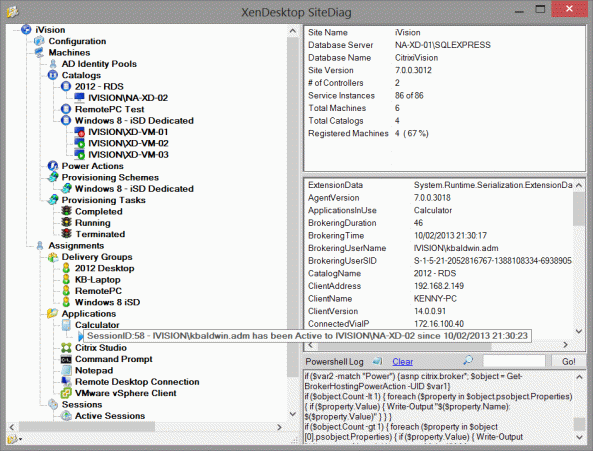
SiteDiag v1.2 for XD7

I think I’ve gotten SiteDiag working pretty well for XD7 now, and feel comfortable to share it as a stable release. I also did some basic testing on XD5, and there doesn’t appear to be any noticeable regressions. As of version 1.2 (10/2/13) I added application icons into the tool using the Get-BrokerIcon cmdlet to convert the Base64 strings to images in the TreeView.

I’ll continue working to build out the functionality of the tool on XD7, so stay tuned for updates as progress is made.

Click here to download the latest stable build.

SiteDiagXD7

XML Broker Health Check

I saw an interesting question in the Citrix support forum today, and thought I’d share. Scott Curtsinger asked the following:

Does anyone know what the easiest way is to check the health of the XML service on XenDesktop 5.6? I’m seeing a lot of information on the web for XenApp but not very much for XenDesktop beyond leveraging devices like a NetScaler.

My first instinct is that this could easily be done via PowerShell, so I did a quick search and found this blog post by Jason Pettys. I also found this great article on working with the Citrix XML service, and quickly put together the following script which I tested against my XenDesktop 5.6 XML broker:

$url = "http://localhost/scripts/wpnbr.dll"
$parameters = '<?xml version="1.0" encoding="utf-8"?><!DOCTYPE NFuseProtocol SYSTEM "NFuse.dtd"><NFuseProtocol version="5.1"><RequestCapabilities></RequestCapabilities></NFuseProtocol>'
$http_request = New-Object -ComObject Msxml2.XMLHTTP
$http_request.open('POST', $url, $false)
$http_request.setRequestHeader("Content-type", "text/xml")
$http_request.setRequestHeader("Content-length", $parameters.Length)
$http_request.setRequestHeader("Connection", "close")
$http_request.send($parameters)
$http_request.statusText
$http_request.responseText

Running this script in PowerShell on my XML broker returned the following list of capabilities, which is a good indication that the XML broker is up and running:

<?xml version="1.0" encoding="UTF-8"?> <!DOCTYPE NFuseProtocol SYSTEM "NFuse.dtd"> <NFuseProtocol version="5.1"> <ResponseCapabilities> <CapabilityId>separate-credentials-validation</CapabilityId> <CapabilityId>multi-image-icons</CapabilityId> <CapabilityId>launch-reference</CapabilityId> <CapabilityId>user-identity</CapabilityId> <CapabilityId>full-icon-data</CapabilityId> <CapabilityId>full-icon-hash</CapabilityId> <CapabilityId>accepts-client-identity-for-power-off</CapabilityId> <CapabilityId>session-sharing</CapabilityId> </ResponseCapabilities> </NFuseProtocol>

This simple script lays a nice foundation to perform XML broker health checks via PoSH. I then took the script a little bit further to test some other XML requests:

param($server, $port)
if ($port){$port = 80}
$creds = Get-Credential
$domainuser= $creds.UserName.Split('\')
$domain = $domainuser[0]
$user = $domainuser[1]
[String]$pw = [Runtime.InteropServices.Marshal]::PtrToStringAuto([Runtime.InteropServices.Marshal]::SecureStringToBSTR($creds.Password))
$nwINFO = Get-WmiObject -ComputerName $env:COMPUTERNAME Win32_NetworkAdapterConfiguration | Where-Object { $_.IPAddress -ne $null }
$ip = $nwINFO.IPAddress
$fqdn = $nwINFO.DNSHostName
$xmlcreds = '<Credentials><UserName>' + $user + '</UserName><Password encoding="cleartext">' + $pw + '</Password><Domain Type="NT">' + $domain + '</Domain></Credentials>'
$envelope = '<?xml version="1.0" encoding="utf-8"?><!DOCTYPE NFuseProtocol SYSTEM "NFuse.dtd"><NFuseProtocol version="5.1">'
$clienttype = '<ClientType>ica30</ClientType>'
$clientdetails = '<ClientName>' + $env:COMPUTERNAME + '</ClientName><ClientAddress addresstype="dot">' + $ip[0] + '</ClientAddress>'
function request ($parameters)
{
 $http_request = New-Object -ComObject Msxml2.XMLHTTP
 $http_request.open('POST', $url, $false)
 $http_request.setRequestHeader("Content-type", "text/xml")
 $http_request.setRequestHeader("Content-length", $parameters.Length)
 $http_request.setRequestHeader("Connection", "close")
 $http_request.send($parameters)
 $http_request.statusText
 $http_request.responseText
}
$url = "http://" + $server + ":" + $port + "/scripts/wpnbr.dll"
$capabilities = request ($envelope + '<RequestCapabilities></RequestCapabilities></NFuseProtocol>')
if (!$capabilities[1].contains('error'))
{
 $testcreds = request ($envelope + '<RequestValidateCredentials>' + $xmlcreds + '</RequestValidateCredentials></NFuseProtocol>')
 if (!$testcreds[1].contains('bad'))
 {
 $appdatareq = request ($envelope + '<RequestAppData><Scope traverse="subtree"></Scope><DesiredDetails>rade-offline-mode</DesiredDetails><ServerType>all</ServerType>' + $clienttype + '<ClientType>content</ClientType>' + $xmlcreds + $clientdetails + '</RequestAppData></NFuseProtocol>')
 $app = $appdatareq[1] -split "<FName>"
 $app = $app[1] -split "</FName>"
 $launchreq = request ($envelope + '<RequestAddress><Name><AppName>' + $app[0] + '</AppName></Name>' + $clientdetails + '<ServerAddress addresstype="dns-port"></ServerAddress>' + $xmlcreds + $clienttype + '</RequestAddress></NFuseProtocol>')
 $launchreq
 }
}

This script takes the server and port, prompts for the credentials that you’re testing (password is sent in clear text), and sends a RequestCapabilities request, followed by RequestValidateCredentials, RequestAppData, and RequestAddress requests. To avoid dependencies on NFuse.dtd, I used a -split on the XML results of the RequestAppData results to get the ‘friendly name’ of the first application returned by RequestAppData, which I used for the RequestAddress post.

From here I’m going to develop a C# service that can monitor the XML service, though I’d like to figure out how to encode the password into the ‘ctx1’ format so that I’m not sending it in clear text.