Checking ADC Settings via ADM

Since there seems to be a fair amount of interest in the ADM PowerShell module I shared, and because the recent release of the v19.4.0.34 (1904) of Citrix Workspace App uses a modern ‘Crypto Kit’ (see CTX250104) that requires ECDHE ciphers and ECC curve bindings, I thought I’d share a basic script that leverages ADM’s capabilities as an API proxy to check out NetScaler/ADC configurations.

Using the ADM.psm1 PowerShell module, the following script will generate a .csv list of every ADC in the ADM inventory’s Citrix Gateway vServer ECC curve bindings:

Param(
    [string]$ADMHost = "https://adm.domain.local",
    [string]$OutFile = ".\out.csv"
)
$RunningPath = Split-Path -parent $MyInvocation.MyCommand.Definition
Set-Location $RunningPath
Import-Module '.\ADM.psm1' -Force
$ADMSession = Connect-ADM $ADMHost (Get-Credential)
$Output = @()
foreach ($ADC in (Invoke-ADMNitro -ADMSession $ADMSession -OperationMethod GET -ResourceType ns).ns) 
{
    $vServers = (Invoke-ADMNitro -ADMSession $ADMSession -OperationMethod GET -ResourceType vpnvserver -ADCHost $ADC.ip_address).vpnvserver
    foreach ($vServer in $vServers)
    {
        $ECCBindings = (Invoke-ADMNitro -ADMSession $ADMSession -OperationMethod GET -ResourceType sslvserver_ecccurve_binding -ResourceName $vServer.name -ADCHost $ADC.ip_address).sslvserver_ecccurve_binding
        foreach ($Binding in $ECCBindings)
        {
            $ExportObject = New-Object PSCustomObject -Property @{
            'ADC Name' = $ADC.hostname
            'ECC Curve' = $Binding.ecccurvename
            'vServer' = $Binding.vservername 
            }
            $Output += $ExportObject
        }
    }    
}
$Output | Export-Csv $OutFile -NoTypeInformation
Invoke-Item $OutFile

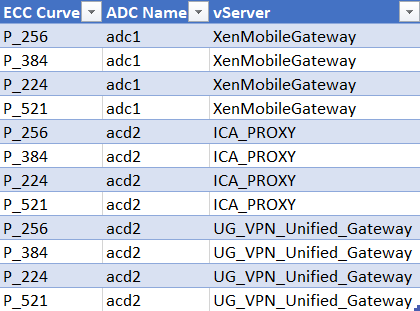
If you were following along, and everything went well, your associated .csv viewer should show you the results:

ecc_bindings

One of the great things about using ADM as an API proxy is that it takes care of organizing ADCs, which makes scripted interactions much more manageable, especially when you’re dealing with a global deployment of ADCs (i.e. ‘more than a few’).

Taking this further, if I wanted to only target a specific device group in the above query I could filter the ADC list by first getting the device_group object with name = “Group1”, which can be passed to Invoke-ADMNitro -Filters as a hashtable:

$Filter = @{
    name = "Group1"
}
$DeviceGroups = (Invoke-ADMNitro -ADMSession $ADMSession -OperationMethod GET -ResourceType device_group -Filters $Filter).device_group
foreach ($Device in $DeviceGroups.static_device_list_arr)
{	
    $vServers = (Invoke-ADMNitro -ADMSession $ADMSession -OperationMethod GET -ResourceType vpnvserver -ADCHost $Device).vpnvserver
    foreach ($vServer in $vServers)
    { ...

You can then use the array of device IP addresses, instead of all ADCs, to check against.

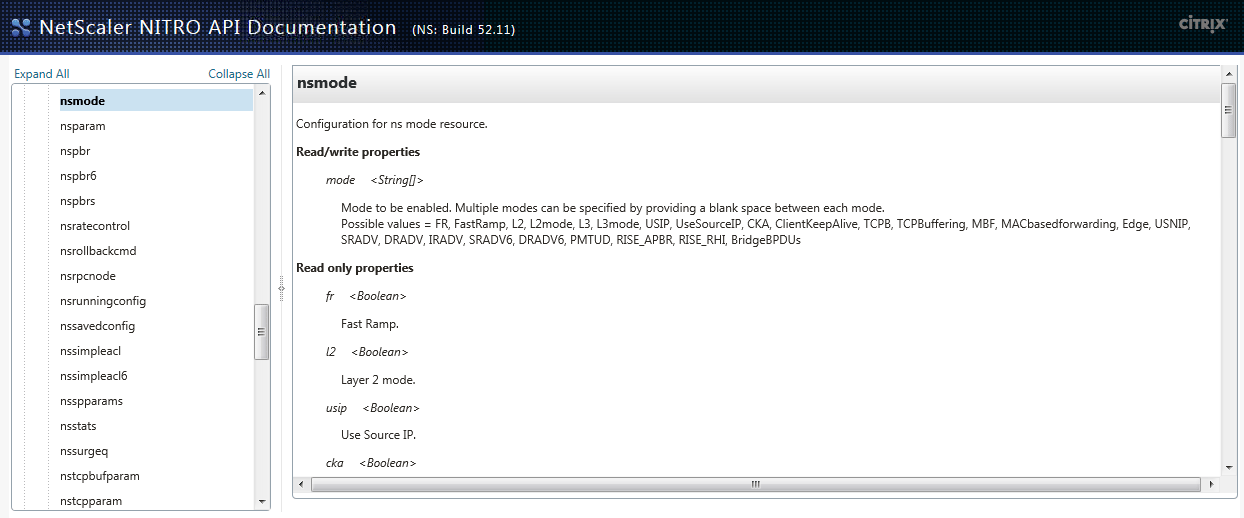
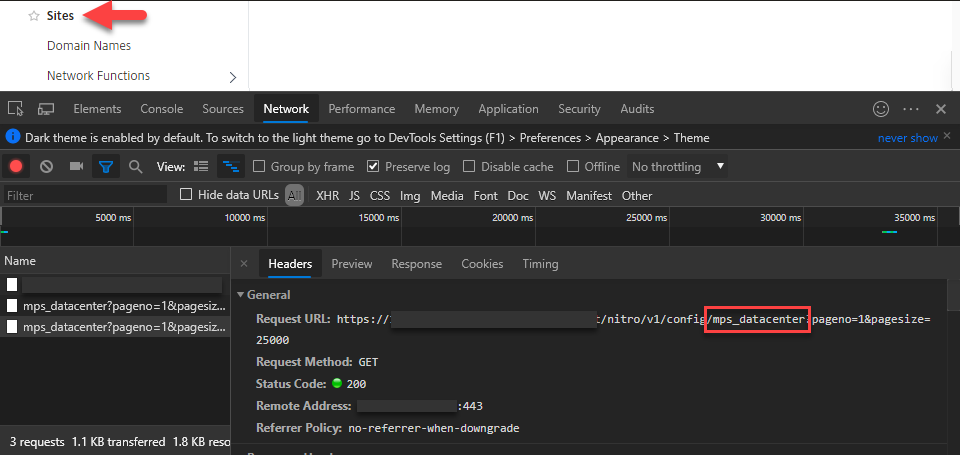
Similarly, you could do the same using by region or ‘Sites’ (e.g. Datacenters) if you’ve populated them in ADM, or using a wildcard match on the filter. If you’re ever unsure about what the ResourceName or filter should be, just open your F12 debug tools in Chrome and inspect the requests in the network tab:

f12

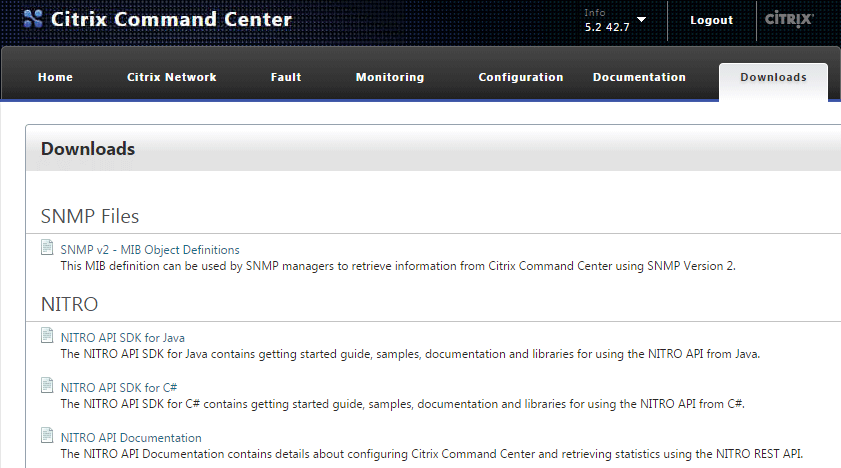
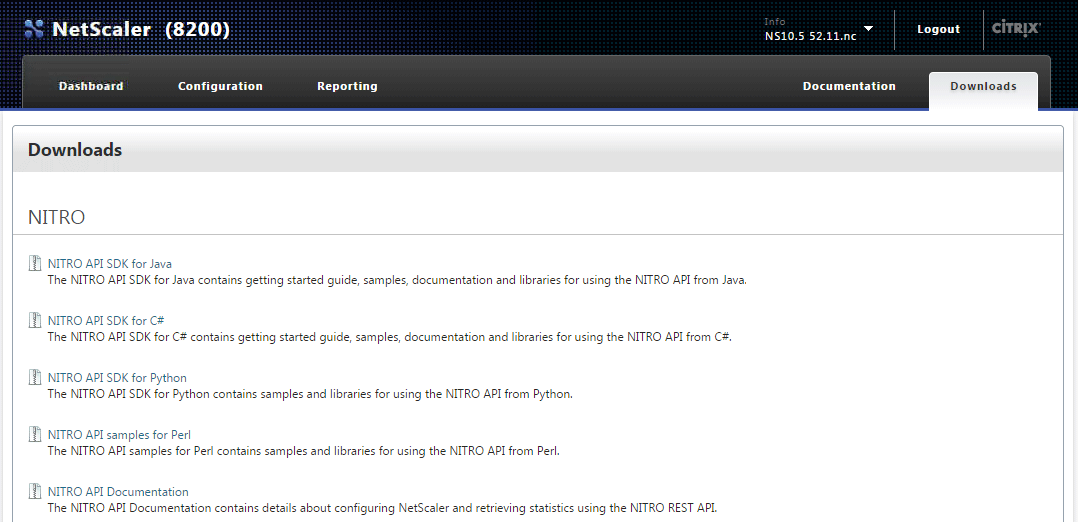
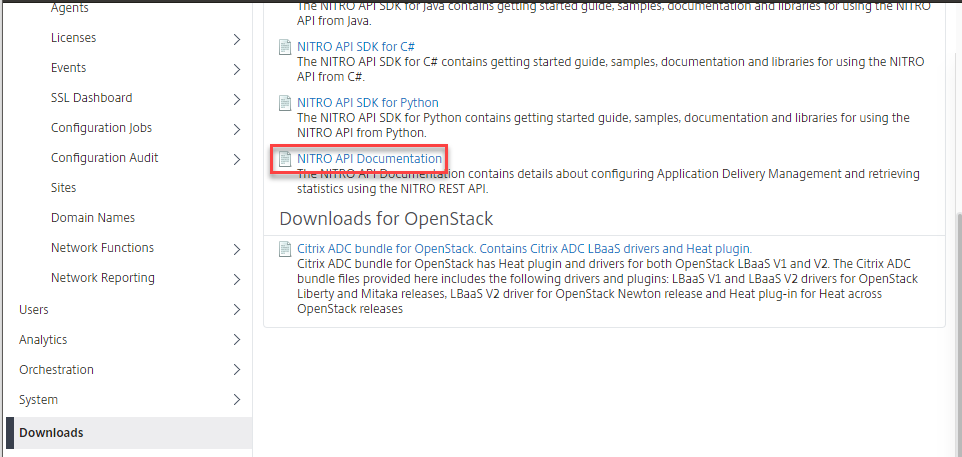
Similarly, you can always download the API docs and/or SDK from the ‘Downloads’ section in ADM, which I prefer to view the C# API SDK in DotPeek:

api_docs

Anyways, I’ll try to share other examples as I get time, but hopefully this was useful for someone out there!

Nitro C# APIs for Command Center – Scripting with PowerShell

In my previous post on the Nitro APIs for NetScaler I shared some PowerShell examples for interacting with a NetScaler using the Nitro C# API SDK in PowerShell. I wanted to share some similar tips and samples for scripting with the Command Center APIs, which has quite a few more gotchas than the NetScaler APIs (in my opinion :).

Loading the Command Center version of the Nitro C# framework in PowerShell is about the same as the NetScaler. Just like on the NetScaler, the needed assemblies can be found at the ‘Downloads’ section on the Command Center web console:

Command Center Downloads

Download and extract the tarball to your scripting environment’s working directory. Next, add the Command Center Nitro .NET framework into your runspace using the Add-Type cmdlet:

Add-Type -Path .\newtonsoft.json.dll
Add-Type -Path .\cmdctr_nitro.dll

The last requirement, which is not needed with the NetScaler APIs, is to copy ccapi.xml to your $HOME directory:

Copy-Item -Path .\ccapi.xml -Destination $HOME

If you don’t have this file in your $HOME directory you’ll get an exception when attempting to connect to the server. To do so, use com.citrix.cmdctr.nitro.service.nitro_service.login(UserName, Password):

$Credentials = Get-Credential
$nitrosession = new-object com.citrix.cmdctr.nitro.service.nitro_service($ccserver,8443,"https")
$nitrosession.login($Credentials.GetNetworkCredential().UserName, $Credentials.GetNetworkCredential().Password)

Once logged in the class heirarchy is very similar to the NetScaler APIs. Let’s look at a couple of examples of what you can do from here with some code snips along the way.

The primary reason that I wanted to write a script against Command Center was to run batches of tasks against a list of NetScalers and variables. In the script I took two such csv lists as parameters loop on each to execute the tasks sequentially against each NetScaler in the list.In this example I’ll show you how to run a custom task and passing values to populate the task’s ‘UserInput’ variables.

First, create a custom task in Command Center, in this example we’ll add a user that’s passed as a variable $user$:

Command Center Custom Task

In your PowerShell runspace load the following cmdctr.nitro.resource.configuration objects; ns_task_execution_data to get the task’s UserInput values, an ns_task of the task that will be executed, and a scheduler_data to specify how it should be execute:

$taskname = "Test"
$user = "User1"
$nsip = "10.0.0.1"
$task = New-Object com.citrix.cmdctr.nitro.resource.configuration.ns_task_execution_data
$taskdetails = [com.citrix.cmdctr.nitro.resource.configuration.ns_task]::get($nitrosession, $taskname)
$taskschedule = New-Object com.citrix.cmdctr.nitro.resource.configuration.scheduler_data
$taskschedule.recurr_type = "no_reccur"

From here we’ll need to put the user variable into the $task.user_input_props property. To do this you’ll need to build an explicit Dictionary[System.String,System.String] object:

$userinputprops = New-Object "System.Collections.Generic.Dictionary``2[System.String,System.String]"

Next, assign the user name variable taskdetails.task_variable_list[0].name dictionary entry. Note that the format is very specific here, most notably explicit single quotes around $UserInput$ to make sure the $’s stay in the string:

$userinputprops['$UserInput$' + $taskdetails.task_variable_list[0].name] = $user)

Since there’s only one variable in this task, we can set the $task.user_input_props property using ns_taskexecution_data.set_user_input_props(), but would otherwise do a for loop on the $taskdetails.task_variable[] array to assign multiple variables:

$task.set_user_input_props($userinputprops)

Now fill out a few other task properties, including the user who ran the job, an annotation notating the computer it was executed from, the target NetScaler IP to run the task against

$task.task_name = $taskdetails.name
$task.executed_by = ($Credentials.UserName).Split('\')[1]
$task.scheduler_data = $taskschedule
$task.annotation = "Nitro automated task executed from $($env:COMPUTERNAME)"
$task.device_list = $nsip

Then execute the task using the execute() method of the ns_task_execution_data class, passing the $task object as the second parameter:

$task = [com.citrix.cmdctr.nitro.resource.configuration.ns_task_execution_data]::execute($nitrosession,$cctask)

This will start the task in Command Center, which can then be monitored by calling get() in ns_task_status:

$taskstatus = [com.citrix.cmdctr.nitro.resource.configuration.ns_task_status]::get($nitrosession, ($cctask.execution_ids)[0])

You can then do a while/start-sleep loop on $taskstatus.status to find out what happened:

Do { $taskstatus = [com.citrix.cmdctr.nitro.resource.configuration.ns_task_status]::get($nitrosession, ($cctask.execution_ids)[0])
Start-Sleep -Seconds 1 }
While ($taskstatus.status -match "Progress" -or $taskstatus.status -match "Queued")

Once the task is complete, check the status of what happened:

if ($taskstatus.status -eq "Success")
{ Write-Host "$($cctask.task_name) completed on $nsip" }

As always it’s a lot easier to deal with a success than a failure, here’s wait it takes to see what command failed, and what the error was, if the task faced a conflicting config:

if ($taskstatus.status -eq "Failed")
{	
 $ccfilter = New-Object com.citrix.cmdctr.nitro.util.filtervalue
 $ccfilter.properties.Add("id",$taskstatus.taskexecution_id + "")
 $errorlog = [com.citrix.cmdctr.nitro.resource.configuration.command_log]::get_filtered($nit rosession,$ccfilter)
 $failedcmd = ($errorlog.output.Split("`n")[2] -replace "`n|`r").Split(':')[1]
 $failedmsg = ($errorlog.output.Split("`n")[3] -replace "`n|`r").Split(':')[1] 
 Write-Host "$($cctask.task_name) failed at '$failedcmd', the error was '$failedmsg'"	
}

I hope this example was useful and that you enjoyed a second Nitro boost for your Citrix scripting repertoire!

Nitro C# APIs for NetScaler – Scripting with PowerShell

Hello again! It’s been a while, I know, but I’m back with some fresh goodness that I hope you will enjoy. I want to give a quick shout out to Thomas Poppelgaard for encouraging me to share some new content, and in return I promised him that I’ll dust off SiteDiag in the near future 🙂 Since my last post I joined a financial services firm where I’ve been working on a global NetScaler deployment, so I’ve got lots of great insights about NetScaler and Command Center that I wanted to share.

During my involvement on the engineering side of a larger NetScaler deployment I came across several situations that warranted scripts for both NetScaler and Command Center. The primary driver behind these scripts was the automation of configuration deployment and management (comparing and setting configurations against lists of NetScalers). This post aims to cover the basics of using the C# Nitro APIs in PowerShell. I also hope to share similar tips on the Command Center APIs in a future post.

So, to get started scripting you’ll need to download and extract the Nitro API SDK for C# to the host where you plan to run the script. The download is hosted on the NetScaler itself under the ‘Downloads’ section (on the far right in 10.5):

NetScaler API SDK Downloads

NetScaler API SDK Downloads

Once you’ve extracted everything out you’ll have two DLLs that will need to be loaded into your PowerShell environment, newtonsoft.json.dll and nitro.dll. To ‘include’ these runtime libraries in your script, simply use the Add-Type cmdlet for each:

Add-Type -Path .\newtonsoft.json.dll
Add-Type -Path .\nitro.dll

Now that the runtime libraries are included you can directly call the Nitro objects using the com.citrix.netscaler.nitro namespace:

com.citrix.netscaler.nitro Namespace


The next step is to connect to the NetScaler by creating com.citrix.netscaler.nitro.service.nitro_service object and calling the login() method, which looks like this in PowerShell:

$Credentials = Get-Credential #prompt for credentials
$nitrosession = New-Object com.citrix.netscaler.nitro.service.nitro_service("netscaler.fqdn",'HTTPS') 
$nitrosession.login($Credentials.GetNetworkCredential().UserName, $Credentials.GetNetworkCredential().Password)

And this is where the ‘fun’ starts. Referencing the Nitro API Documentation, you can explore all of the classes and methods that are now at your disposal, including every imaginable configuration and statistic.

Let’s take an example of checking the status of modes, which is handled by the com.citrix.netscaler.nitro.resource.config.ns.nsmode class:

com.citrix.netscaler.nitro.resource.config.ns.nsmode


Say you wanted to get all of the modes that are currently set on a NetScaler, you’d simply call the get() method, passing the $nitrosession object as the only argument:

[com.citrix.netscaler.nitro.resource.config.ns.nsmode]::get($nitrosession)

mode : {FR, L3, MBF, Edge...}
fr : True
l2 : False
usip : False
cka : False
tcpb : False
mbf : True
edge : True
usnip : True
l3 : True
pmtud : True
sradv : False
dradv : False
iradv : False
sradv6 : False
dradv6 : False
bridgebpdus : False

This command uses the nitro_service object as the connection reference for the nsmode.get() method, pretty straightforward.

Now, say you wanted to change one of the modes, L2 in this example, and this is where it can get a little tricky. First, you’ll need to store nsmode in a PowerShell object using the same get() method above:

$nsmode = [com.citrix.netscaler.nitro.resource.config.ns.nsmode]::get($nitrosession)

Then you’ll need to build an array of modes that you want to enable, including any that are already enabled, to pass to the enable() method (there’s probably an easier way to do this than the below snippet, but hey, it works!):

$modes = @(); foreach ($mode in $nsmode.mode){$modes += $mode}; $modes += "L2"

This will give you an array ($modes) that contains all of the modes that you want to enable, plus the modes that were already enabled. You’ll then need to use the nsmode.set_mode() method to set the modes that should be passed to the enable() method:

$nsmode.set_mode($modes)

And the moment of truth, passing the modified $nsmode object to the enable() method:

[com.citrix.netscaler.nitro.resource.config.ns.nsmode]::enable($nitrosession, $nsmode)
errorcode  message sessionid severity 
---------  ------- --------- -------- 
0         Done              NONE

Let’s explore another example that involves a rewrite policy and action set, which can quickly become a web of interconnecting classes and methods.

First, let’s put all of the rewrite policies into an object:

$rewritepolicies = [com.citrix.netscaler.nitro.resource.config.rewrite.rewritepolicy]::get($nitrosession)

Which will give you a collection of rewrite policy objects in the following format:

__count : 
name : ns_cvpn_sp_js_vgp_pol
rule : http.req.url.path.endswith("ViewGroupPermissions.aspx") && http.req.method.eq(POST) && http.res.body(10).contains("0|/")
action : ns_cvpn_sp_ct_rw_act
undefaction : 
comment : 
logaction : 
newname : 
hits : 0
undefhits : 0
description : 
isdefault : True
builtin :

From here, you can call other methods for the rewrite class by referencing the object that you’re interested in. For example, to get a list of bindings for ns_cvpn_default_bypass_url_pol, which is the first policy returned on a NetScaler, you would reference $rewritepolicies[0].name when using the rewritepolicy_binding.get() method:

[com.citrix.netscaler.nitro.resource.config.rewrite.rewritepolicy_binding]::get($nitrosession, $rewritepolicies[0].name)

Similarly, you can get a rewrite action by referencing the rewrite policy’s action property:

[com.citrix.netscaler.nitro.resource.config.rewrite.rewriteaction]::get($nitrosession,$rewritepolicies[0].action)

I’ll stop here for the sake of time and complexity, as there are so many ways that you can go with this foundation. I highly recommend using a tool like PowerGUI so that you can see the classes as you type, and explore the various objects and methods at your disposal.

Anyways, I hope this all makes enough sense for someone to start scripting for NetScalers in PowerShell, and will try to post a similar article on the Command Center APIs soon.